


Straußenfeder-Kronleuchter
SKU23123C1
- Auf Lager
- LED-Leuchtmittel enthalten
- Nachhaltige Verpackungen
- Sichere und geschützte Zahlungen
- Anpassung unterstützen
- Kostenloser Standardversand
Standardversand
- Bearbeitungszeit: 3–5 Werktage.
- Versandzeit: 12–25 Werktage.
- Gesamtlieferzeit: ca. 15–30 Werktage vom Kaufdatum bis zur Zustellung.
👉 Der Standardversand wird normalerweise für Bestellungen verwendet und ist kostenlos.
Expressversand
- Bearbeitungszeit: 1–3 Werktage.
- Versandzeit: 9–12 Werktage.
- Gesamtlieferzeit: ca. 10–15 Werktage vom Kaufdatum bis zur Zustellung.
👉 Der Expressversand gilt als besonderer Service; die Versandkosten variieren je nach Bestellwert. Detaillierte Preise und Bedingungen finden Sie auf unserer Seite Versandbedingungen.
Beschreibung
Verwandeln Sie jeden Raum in einen luxuriösen und eleganten Ort mit unserem Straußenfeder-Kronleuchter. Lassen Sie sich von den weichen, zarten Federn und dem warmen Licht in eine Welt voller Opulenz und Genuss entführen. Werten Sie Ihre Inneneinrichtung auf und beeindrucken Sie Ihre Gäste mit diesem atemberaubenden Highlight.

*Hinweis: Bitte beachten Sie, dass die Farben aufgrund der handgefärbten Federn variieren können.
Wir bieten 15 wunderschöne Farbtöne zur Auswahl an. Sollten Sie andere Farben wünschen, kontaktieren Sie bitte unseren Online-Support.
Produktvideo
Die gleiche Produktserie, klicken Sie auf das Bild, um mehr zu erfahren >>>
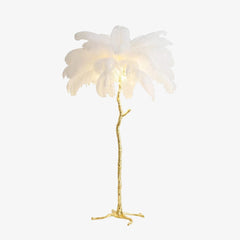
Produktgröße
Größe A: ∅ 75 cm x H 40 cm
Größe B: ∅ 100 cm x H 40 cm

Parameter
- Stil: Elegant, natürlich
- Material: Messing, Straußenfeder, Glas
- Leuchtmittel: G9
- Farbtemperatur: 3000K
- Spannung: AC 110-240V
- Montage: Decke
- Umgebung: Innenbereich
- Anwendbare Fläche: 10-15㎡
- Anwendbare Räume: Zuhause, Schlafzimmer, Wohnzimmer, Hotel, etc.
- Ausführungen: Weiß, Grau, Blau, Schwarz, Rot, Orange, Hellorange
- IP-Schutzart: 20 – nicht wasserdicht
- Zertifizierung: UL, CE, CCC, SAA, etc.
Hinweise zum Kauf
Wenn Sie Fragen zu unseren Produkten haben, kontaktieren Sie uns bitte und wir werden Ihnen innerhalb von 12 Stunden antworten.
Bei Problemen mit der Zollabfertigung oder Transportschäden kontaktieren Sie uns bitte per E-Mail. E-Mail-Adresse: info@dekoorlight.com
Download-Support
 |
 |
| Installation | Spezifikationen |


